Showing posts with label Sensory Tub. Show all posts

Sunday, October 6, 2013

Our Fall/Halloween Sensory Tub

I was trying to make a sensory tub with corn but I couldn't find any for some reason. So I bought bird food and that is what I used! They are sun flower seeds. I bought them at the 99 cent store. I used two bags. I also added spiders, and other plastic rings, an eye scoop, etc. My kids really like to play with it. I also added "invisible" numbers.  


Share a link of your sensory tub!!

Sunday, August 11, 2013

DIY Sensory Tub

I made (put together) this very easy sensory tub. I used an apple crate I bought in Jo-Ann's Fabrics, the green tray is from IKEA and I used a paint stick to hold the tray. You can get crates in ebay or craigslist sometimes even for free. My husband was out of town and I really want it to make it so this is what I came up with. I am pretty sure he would have screw a dowel or a piece of wood instead. But if your husband is not so handy or out out town like mine you can make this very easily yourself.

Materials:
- A crate
- Paint stir stick (free at a hardware store)
- 2 small nails
- A hammer
- Rubbermaid container (optional: I like to use it so I can use the cover and the rice doesn't get full of moths)


Is so simple...Use the hammer to attach the stick to the side of the crate....  

Place the 
green tray inside...


 fill the Rubbermaid container

a and put it in!! That's it! 

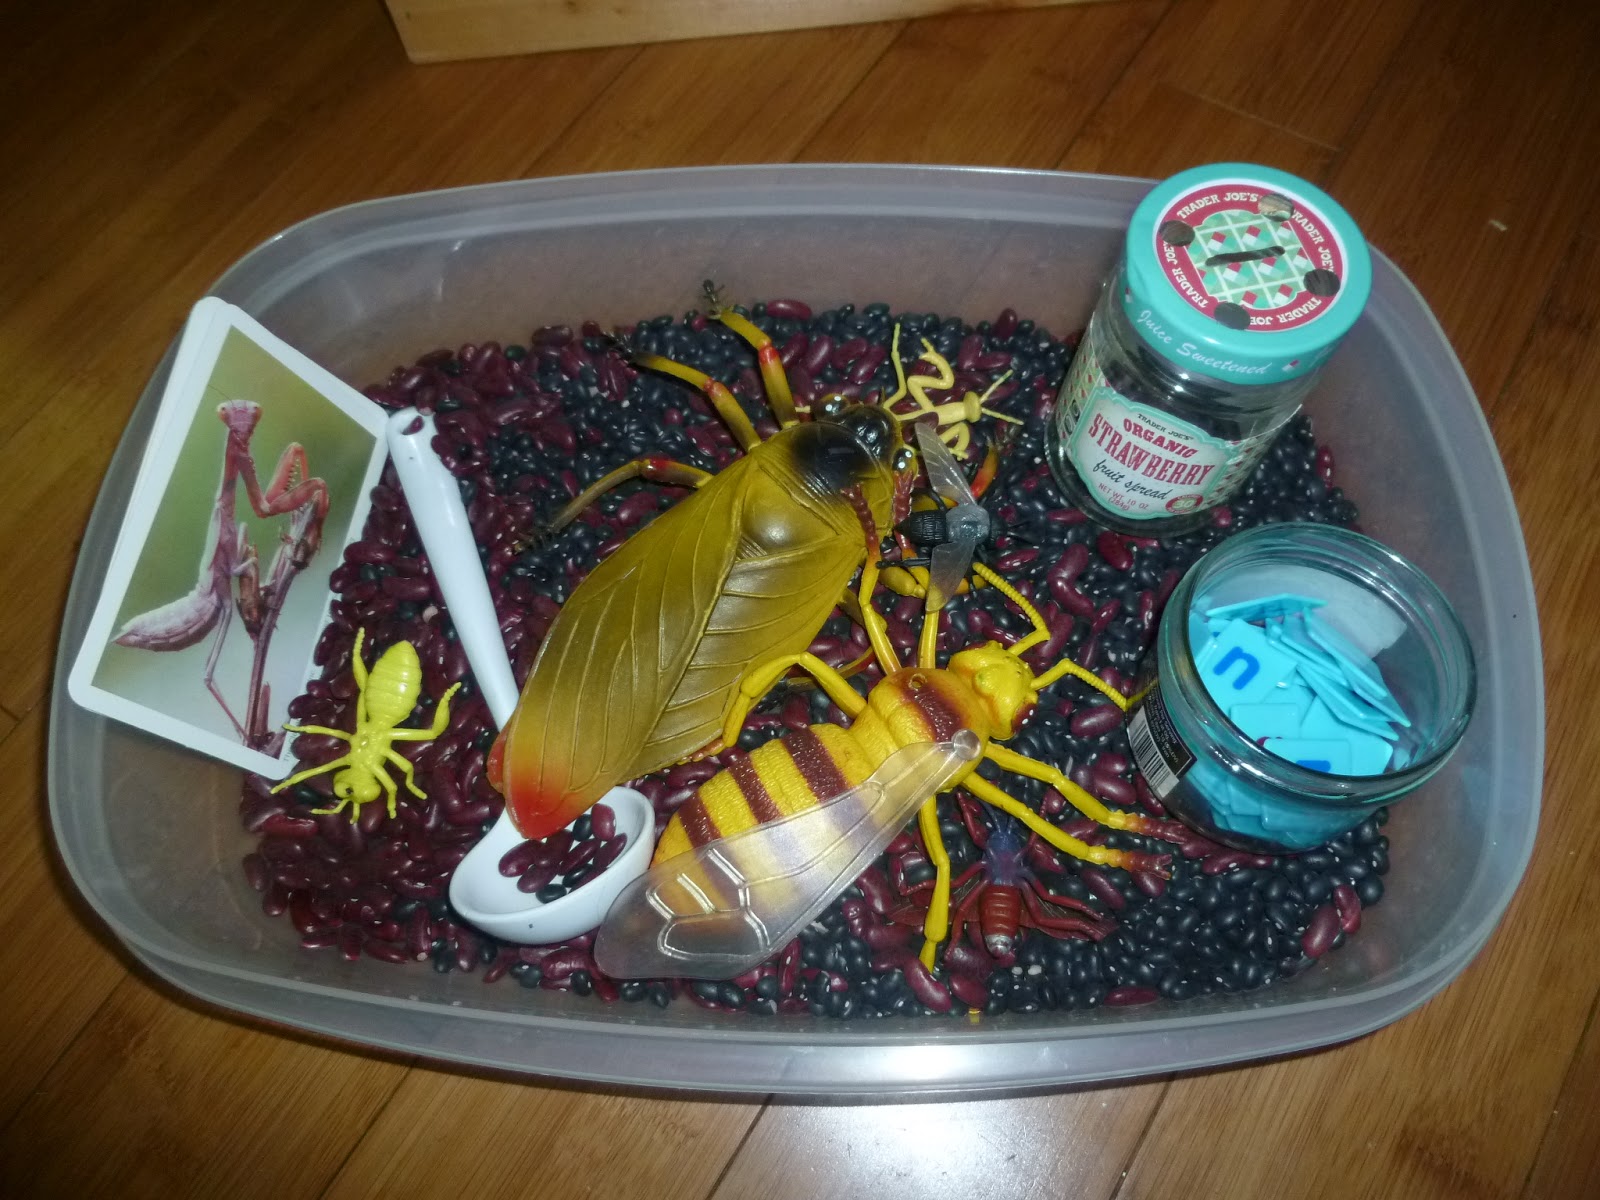
This is an example of one we set up. It is a bug sensory bin. This sensory bin is great
because it is raced from the floor without being too hight the child has to stand...so they can get on their knees if they are little or sitting if they are bigger.

You can even use the inside to store sensory bin items!!!!! 

What else? You can attach pockets to the side to store more things....or even attach a tray to hold spoons and cups and other utensils you are using.

What else? You tell me! What else you can do with it or add to it?

Monday, February 4, 2013

DIY Toddler Jar for Fine Motor Skill

I used a fruit spread jar and made 4 holes big enough to put beans through and maybe small beads and a slot for the plastic letter that I bought in Lakeshore outlet.


   This is an addition to the sensory bin. Our theme is bugs. Even thought this jar is not bug related I always like to add language whenever I can. I make the bin for Little Princes and Umi so there are things that both can do. Like for example, plastic letters for spelling (Umi) and for learning letters (LP), bean pouring, plastic bugs, little jar for putting the bugs, I may add number cards for counting, picture of bugs, etc.

I will post a picture of the sensory bin in my next post! Did you make a bug sensory bin too? Please, link some pictures to share with others!

Thursday, January 24, 2013

Water Bead Science


For our science sensory bin this week we placed water beads in water and then we observed the changes. I was amazed by the little, fun and bouncy water balls. We did this once before but we chose one color. This time we did a little of all the colors we have. What was weird is that the clear ones were invisible! It may be obvious now that I think about it, but just like a child we did this activity with no expectations. I knew they were going to expand, but what I didn't know is that the clear ones (that didn't look that clear when they were dry and hard) were going to be invisible!

So, if you decide to play with your children with water beads you could try different experiments. For example, choose red beads and put them in red colored water. Would they be invisible too? What if you put yellow beads in blue water. Would they change the color? What happen if you put them in the freezer? You can talk about what things are invisible in the real world. Like a stick bug on a branch. They camouflage with their surroundings. Or things that are there all the time but we don't see them. For example, when we go to the supermarket we are always looking at the products they have, at the floor, at your child pulling his siblings hair, or the little toddler pulling things off the shelves! haha. We don't normally look at the ceiling, or at the art work if there is any. Then is when we notice that those things were there all the time but we never paid attention to it. Before those things were invisible to us even though they were there all the time. Next time you go to the market ask your children to look at places they never saw before!

Tuesday, April 10, 2012

Outdoor Sensory Tub Activity

Materials:

- Jars and/or tupperware
- Colored cotton balls
- Shaving cream
-Ladle 
- Food coloring
- Turkey baster
- Water

Fill 3/4 of the jars with water and then add shaving cream to the top. Add water to the tub and food coloring on the shaving cream. I got this idea from Teacher Tom and I added my touches. He has a great blog.

Umi liked to squish the baster and also catch cotton balls with the ladle.


This was a fun activity. He learned:

- Color changes when they are mixed
- If you squish the cotton balls water comes out
- How to use the baster
- Pouring water from one jar to another
- Shaving cream makes the water slippery, soapy and foamy

You could add water beads! I will try that tomorrow!


Wednesday, March 28, 2012

Water Beads Sensory Tub

This is a good way to teach science. It is a very sensorial activity where the children learn transformation, water absorption, color, etc.


This are the beads in the package.

Umi really liked squishing them until they broke.

This beads are wet and dry, bouncy and colorful.  They are used in flower bases and pots instead of dirt or water for decorative purposes. And it is great for the sensory tub and sciences experiment. The beads don't absorb the water immediately it takes time so your child can see the process and how long it takes. 

This is how they look after a few days of the water starting to evaporate.  Once dried you can store them in a sandwich bag and reuse! 


Wednesday, December 21, 2011

Christmas/winter Sensory Tub

We used Insta-Snow, 2 trees, cotton balls and erasures that we got at the Dollar Tree store. I added two Christmas cups that we had and a penguin. He can use the spatula 
as a snowplow to make a road, etc.


This is a fun activity to do with your child. BB loves it and he is there playing as I 
write this. We may add glitter later to add to the sensorial part of this activity. BB helped with the measuring and watched as the powder turns into snow, great science experiment. For another science experiment put some of the "snow" in the freezer 
and come back several hours later to see what happened!
Note: Make sure your child doesn't put the 'snow' in his mouth or eyes. I am pretty sure it is not good*. BB is very good with not putting things in his mouth.

* Please read this Insta-snow precaution info.

Monday, August 22, 2011

Sensory tubs!

Today's sensory tub
8/22/11


Today Big Boy came up with his own idea of a sensory tub. He brought the black beans, and pinto beans. I added a few foam letters, 3 baby food jars for sorting the beans and letters and a clothe pin for picking up the beans, etc.

Here are pictures of other sensory tubs we made


 His 2 year old birthday sensory tub consists of:
Shredded construction paper
Scissors
Bow
Aromatic candle

Saint Patrick's Day sensory tub:
Green colored rice
Pennies
2 Baby food Jars. I glued rice to one of them and a penny to the other for sorting
A green melon scented candle 
Snow globe from the 99 c store
Saint Patrick's glasses from 99 c store
A little S P shot cup from 99 c store
And a spoon (not shown)