Sunday, September 7, 2014

First Grade Curriculum Choices 2014


We set up this room to do part of our homeschool work and the rest we do it in our school house.


This is where I keep the curriculum not being used at the moment and other supplies.

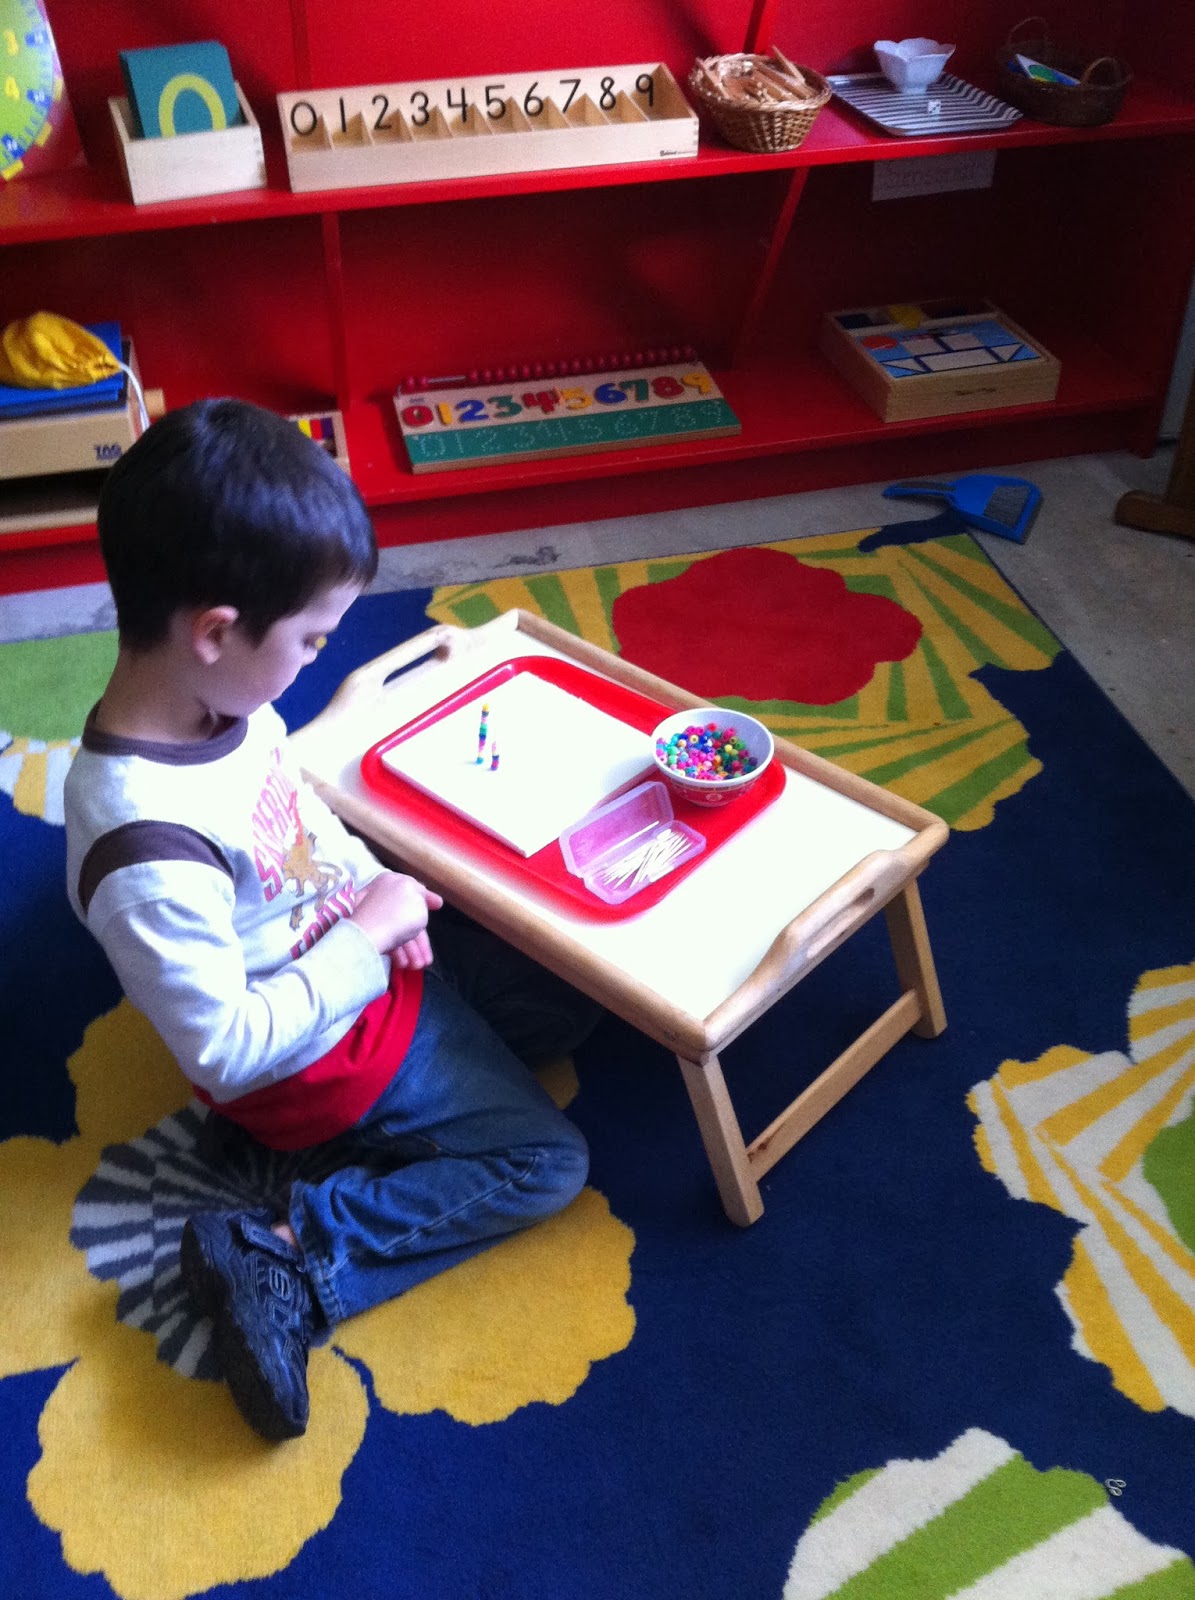
This is the set up for AAS on the magnetic board that my husband made long time ago.

All About Spelling (AAS) Level 1: The first part of this level teaches the phonograms. So since he knows that we will skip it. And also we are going to go fast through the middle part because he knows most of the words taught there but it will serve as a good review and it teaches some grammar rules that he doesn't know yet.


Exploration Education activity book above and projects below. We haven't started it yet. I liked the fact that it shows a video, then there is 2 activities to do on the activity book. It seems easy and it comes with pretty much all you need for the projects (you need things you already may have around the house).


This is fun!!! He really likes doing this workbook. You need to read the first word
then it will give you a clue for the word above it and if you still don't get it there is another clue.. you got to work all the way up that ladder...he really enjoys this word ladders workbook.


Umi likes this book. Maybe because it is kind of easy for him so far but like in the picture below
it helped him also to learn how to draw a flag and other things...so not only he learns math but also practice handwriting.


This is fun. I use it as a group activity so my 3 year old takes part of this too. 
I ask the question, they answer and I write it. Everything goes...it helps them to think out of the box.


After we are done with the review of the continents and we are finish with our North America Continent Box we are going to dive right into learning about our country into more detail. This book was fun and it helps children remembering the name of the states.


This book is a good read. It includes, history, geography and science.


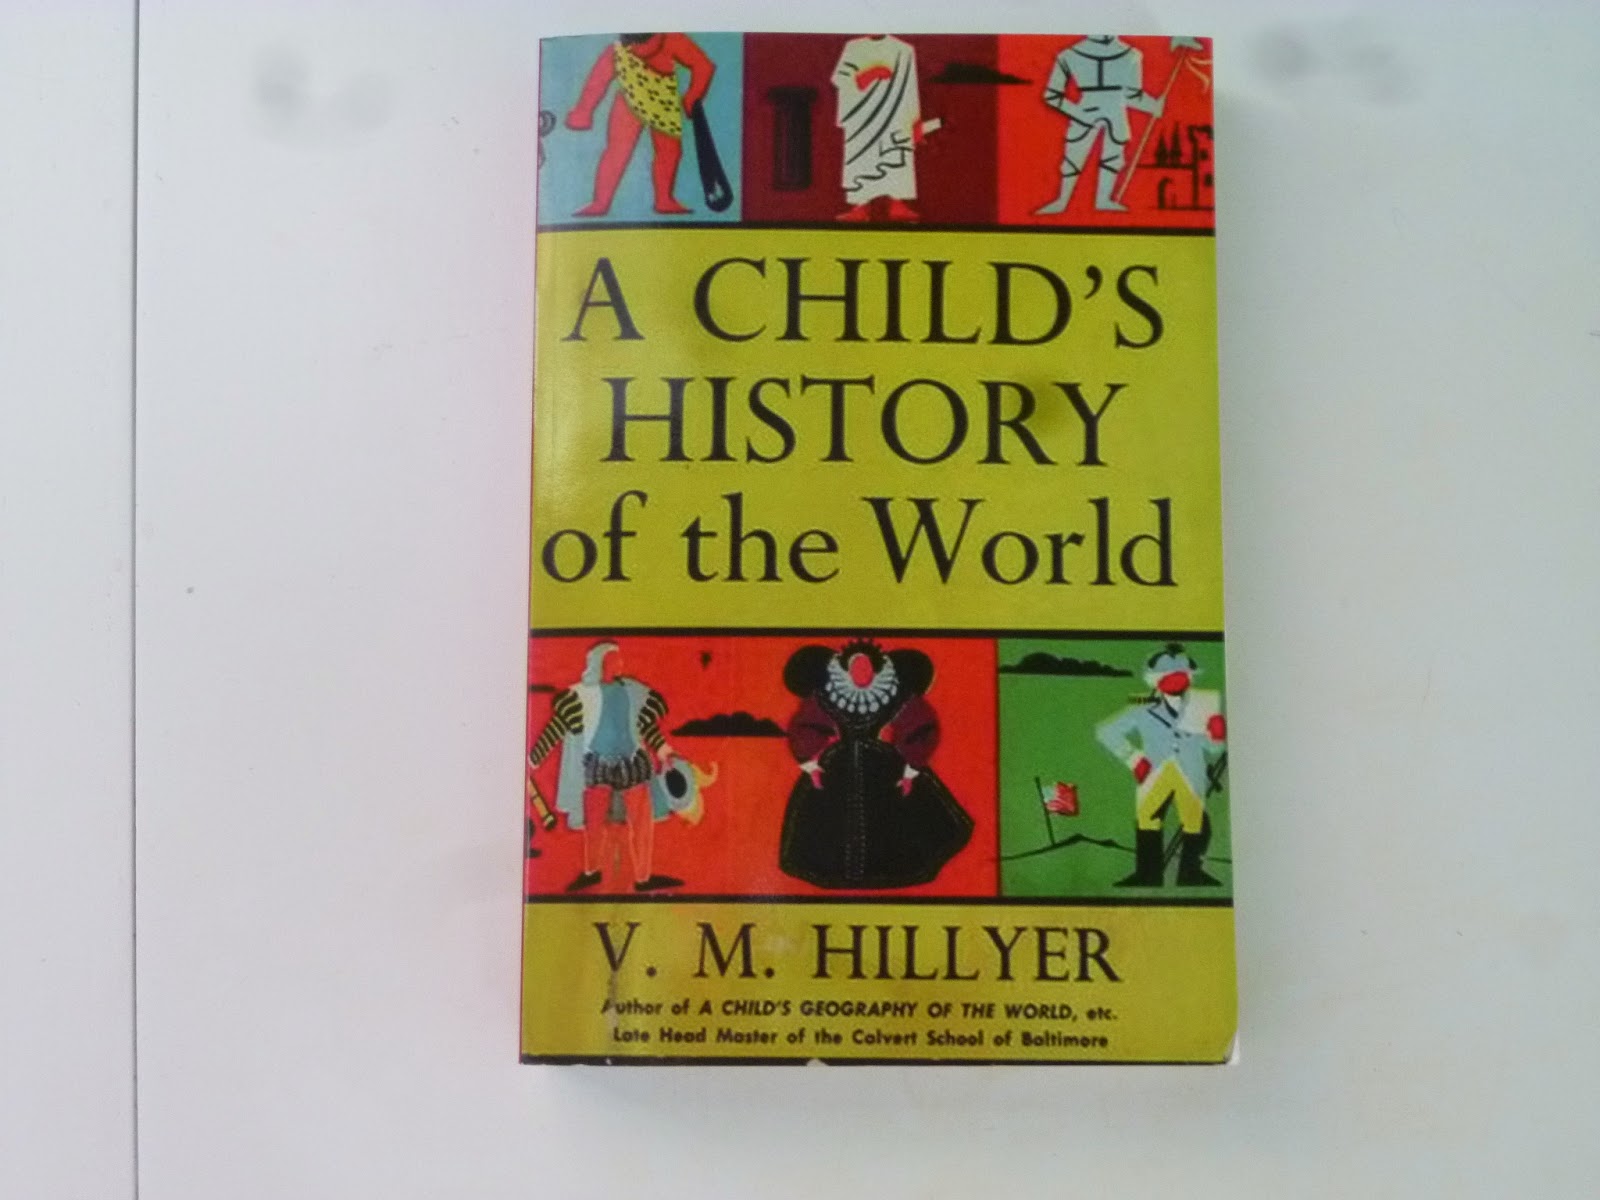
This is our history book we are going to start reading. It is written as a story book what makes it fun and easy to follow. We will also make a timeline from the beginning of the world..

This is Handwriting without Tears for 2nd grade but in Spanish. They have the English version. It is going to help my son to perfect his handwriting.

This is his notebook I prepared for him, it has math and language in Spanish, and other things I thought I'd like him to learn this year. The picture above shows the first activity he did for the first day of classes. It is an all about me sheet I printed from the internet.


I have ordered other things from the charter school so I will add it to this post when I get it.
Using our workboxes helps us to keep all the curriculum organized. So when I fill each workbox hanging file I put one of these curriculums in each number...easy peasy! 

We do art, Montessori and hands on materials in our school house

What is the curriculum your child enjoyed the most?


Saturday, September 6, 2014

Our Homeschool Workboxes 2014

This is our new version of the our Montessori style workbox system we used in 2013. I saw this post by Shoestring Homeschool and that inspired me to make one for us. I had the crates and almost all the materials I needed, all I bought was more hanging file folders.

I got to say that this system is really helping me to get organize with our homeschool. My children seem to get very excited about doing their, work what makes everything easier because they don't feel like is me telling them "here do this work sheet," they know they have to go from one to six and they want to do it.


I used this Making Learning fun calendar pages to make the number grid. I printed 3 copies. I used one as a base and cut it and laminated it. I cut the numbers from he other one and I also laminated it.  The third copy was used to make the number strips to staple them on the file folders. I used velcro dots for the numbers. I wrote their name with dry erase markers on each workbox.

We use the workbox every other day and we go to our school house every other day. This is at least what I proposed myself this year, let see if it happens like that every week...I bet it won't. I set up the workbox on Sunday to be used on Monday. If we got to number 6 that day what is our goal then that day or next day I set it up for Wednesday...If we don't make it to 6 we finish it next day.

How it works? Once they are finished with number 1 they take it from the hanging file and place it on the number grid. When all the numbers are on the number grid they are done. That is it!

By using this system of workboxes you save a lot of space since you can stack each workbox on top of each other. I have one for each of my children. I ended using what we call the computer room as a school room. Here is where we use the curriculum I got for Umi's charter school. It is a small room so I wouldn't have space for the standard work boxes seen in another blogs.

I can't believe that a system so simple can be such a great organization tool for our homeshcool. It helps me to visualize what have to do by giving me a road map of steps to take. No matter what homeschooling philosophy you like or what ever style of homeschooling you do this system can really help you.

Do you have a system that works for you? Please share!

Here are other workbox systems:

Here is Sue Patrick's workbox system, the inventor of the workbox system.

Confessions of a Homeschooler workbox system tutorial video

Workbox Systems on Pinterest!!

Wednesday, August 27, 2014

Best Diaper System Ever

I've have cloth diaper all my kids on and off. I used a mixture of pocket diapers, gDiapers and the best eco disposable diapers I could find. Let me tell you, stuffing the pocket diapers and washing them wasn't fun...My kids didn't like the gDiapers because there is no padding on the elastic and it would bother their hips...I only used the disposable ones at night and when I needed a break from washing, stuffing and hanging diapers. This diapering system was very expensive, the diapers did not last for all my children, it was a pain and I did not know any better until now.

Now with my third child I had to buy all new diapers and I've decided to try trifold diapers and covers. What a discovery for me! Even though this system was a very old system and not new at all it was new to me. It is the cheapest and the easiest way to cloth diaper a baby. What makes it cheaper? You only need a few covers. If the diaper is not soiled you can reuse it over and over again, so you don't need to spend tons of money. Also, buying the covers and the trifold diapers is cheaper than buying other type of diapers even when you buy it organic as I did. In contrast, pocket diapers once they get wet or soiled you have to wash the whole thing. Now, you may wonder what makes it easier? First, you do not have to stuff them or take the insert out every time you wash them. You save a lot of time and energy just there. Second, you don't have to wash the covers every time you change a diaper. By reusing it you save time and energy. After you wash them you can place them around the washer or in a hook to dry, they dry fast.  Third, the trifold diaper can easily be put in the dryer and needs to be folded in half if you like or simply put it in a hamper or basket next to the changing table. Even though hanging the diapers on the line is more ecological and you even save electricity as a homeschool mother of three children I don't have the time for hanging clothes. I figure by using cloth diapers I am already helping the earth. If you are wondering how to cloth diaper and you want an easy and cheap way of doing it try this system!

I use Dandelion organic trifold I bought in Amazon. The cover I use are called Proraps covers. I also bought them on Amazon. They are the cheapest out there, they work good and they are made in USA.

Do you want to buy them used? Visit Diaper Swappers

I hope you enjoy your cloth diapering journey and if you were considering cloth diapering your child this helps you to decide and go for it!

Sunday, August 17, 2014

My Amazing Home Birth Experience

It wasn't until 2 weeks or even 2 and 1/2 weeks after my due date that I went into labor. I wasn't surprised because all my pregnancies went past the due date. My midwife explained to me that 40 weeks is an average and to get to that average there were women that went into labor before the 40 weeks and others after. That is why they came up with 40 weeks as a due date for every pregnancy. Saying that we should all know that not every person is the same and even with the same person not every pregnancy is the same. So we should believe in our body and let baby come out when baby is ready to come out....Or if you try to interfere with the natural process of pregnancy and try to speed it  up because you CAN'T wait to see your baby or you are afraid to be too over due you could end up with an experience similar to mine.

I had 3 due dates, July 2nd, 4th and 7th. When I passed all the due dates my midwife suggested I take castor oil. I read a lot about it. I found people saying it worked for them and others that didn't work. I will tell you my experience and I hope it helps you to make a better choice than me. In my case I was worried that I was going to be too overdue and like it happened with my middle child have to be induced in the hospital...I did NOT want to go to the hospital at all for any reason....So I did take castor oil. It seemed like a good idea at that time because it was better than going to the hospital and miss the amazing opportunity of giving birth at home as I so wanted. But the castor oil back fired, literally! Three hours after I took the castor oil without any effect I took the second dose. I had it with ice cream. It tasted good. Then it  hit me...I had diarrhea (expected) and to make matters worse I had the WORST hemorrhoids EVER! It was burning so bad...It was like I was passing fire for 2 days and1/2!!!! Did caster oil helped me to go into labor? NOT AT ALL....it gave me useless contractions and made me want to go to the hospital and get induced and be over with it...but I didn't go to the hospital...I put up with the pain and the disappointment. I learned my lesson...DO NOT mess with nature...trust your body and that your baby will come out when baby is ready...not when you want.

On July16th I had some stronger than BH contractions and I thought I was going to go into labor...I called my midwife and she cancelled her appointments for that afternoon but the contractions stopped and to my dismay nothing happened. So on July 18th at 2:05AM I wake up with some contractions...they were getting stronger as time passed. At 2:20AM I woke up my husband and asked him to fill the birthing pool. At 2:27AM I called my midwife and I told her I was having strong contractions and I even joked telling her what if they stop like the other ones and you come for nothing? At least I have a big bed we can share it with you! But the contractions just got stronger and stronger...She suggested I walk up and down the stairs but I couldn't I had to get in the pool that by the way it barely had any water... I started to feel a strong pressure to the point I couldn't find ay position to ease the pain...It was 2:55AM I could feel the baby's head that was about 2 inches still inside and my midwife hasn't come. I told my husband to give her a call so he called her at 2:58 and tells her to hurry up. At that time didn't know what to do, so I thought I should push. I pushed once and the baby's head came to the point where if you were looking you could almost see it. I pushed once and her head started bulging. That is when my started screaming "is coming out, is coming out, is coming ouuut!!! HAHA! How about that for a birth announcement for my neighbors! So then I pushed again and her head came out and with her head her whole body!! My baby girl came into the world at 3AM! I picked her up and removed the umbilical cord from around her neck, I sat down to hold her and that is when my midwife came. So I had an unassisted home birth in a way. She came right in time to help her breathe. Phew!

To recap, my labor lasted less than an hour from beginning to end and I pushed for less than 2 minutes and a total of 3 pushes. Wow! The fastest labor and birth ever for me.

I have 3 children and 3 different birth experiences:
Baby #1: Natural unmedicated birth that lasted 16 hours with 3 of those hours pushing...I had him in a hospital....
Baby #2: I was induced at a hospital and I had the epidural. I planned a home birth but due to low amniotic fluid I had to get induced and it lasted about 4 hours and 51 minutes or less ( I can't remember if I was induced at 12 or 12:30ish) andI think I pushed for 15 minutes or so...
Baby #3: Home water birth that lasted less than an hour and I pushed 3 times for 2 minutes.

I wish I had all my babies at home! I never want to have a child in a hospital again....

I am not planning to have more children but if I do I hope my labor is like my baby # 3!!!


Tuesday, June 3, 2014

36 Weeks Pregnant and Home Birth Supplies

I've been neglecting my blog for long time and I apologize for that. I am very busy as most of everybody and as it should my family comes first. Saying that I haven't forgotten about my blog and mostly by my followers!

I am 36 weeks pregnant!!! I am due on 4th of July! I am VERY happy and anxious to meet my little girl. I never thought I was going to have 3 children and even though it was a planned pregnancy it was a surprise to my brain that we were going make the decision of getting pregnant again! So I still can't believe it even if I seem to be following my belly everywhere it goes!!

What it is weird is that  all my children were due on a day 4th! Umi on 4th of March, Little Princess on 4th of  May and now baby #3 on 4th of July. Also they were all born on a different house! I wonder if I should stop moving!! hahaha!

We have decided to give birth at home. We tried with my Little Princess and it didn't work out and I SURE hope it works out this time. I have my birthing room ready, well...almost ready. I still need to get the pool from my midwife and organize the desk and put 2 boxes away...but I have 99 % of the home birth supplies ready!!! I even have some cool decoration and more!

I've bought this print in etsy store called StudioSpriritYSol
I like it and it reads: "Born into sacred water tears rain rivers sea all are one rushing 
forward to meet new life"


Umi made the rock on the left for me. I made the one on the right. 
It has a drawing of a pregnant woman (me) with the open lotus flower
in the womb and it reads One Peaceful Empowering Natural (open) Birth.


I made this rocks to remind me to relax, breathe and focus while I give birth.

I have my rocks set on the window sill right above where the birthing pool will be.


This are affirmation flags I bought it HERE. I really like them and decorate my
birthing room.


Here is where I set up all my birthing supplies.

First Shelf: Candles, Lavender essential oil, matches and the diffuser, Chill Pill essential oil spray, 
calendula ointment, massage cream, my camera, iPod, calendula tea for the sitz bath and peri bottle, after birth tea, Electrolyte waters for keeping hydrated.

First Shelf: arnica pellets, peri bottle, witch hazel to add to the maxi-pads and place them in the freezer to be used later to cool the perineum area, a hand held mirror to see baby being born, a fish net and doggy bags (you can imagine what the last two are for). I still need to add a bottle of hydrogen peroxide.

Second Shelf: 6 bath towels, 4 washcloths, baby towels and receiving blankets, baby's fist outfit and hats, what I am going to be wearing during birth, if I wear something at all.

Third Shelf: and old waterproof mattress cover (king size), a fabric I had to cover birth ball, a new lead free hose and the adapter for the shower.

Bottom Shelf: paper towels, toilet paper, two ziplog bags gallon bags, the inflator for the birth ball, a ring cushion for during and after birth, a hot water bottle, a waterproof floating flash light and maxipads. I am planning on getting some depends too, I bet they are more comfy than putting on maxi pads...I was wondering about buying under pads... 

This room is where the computer is, so I will have access to music, and maybe a movie? haha I am going to be too busy concentrating and breathing!


This is the birthing ball I used with Umi and Little Princess!


Inside this box there is a sitz bath for after birth.


Here is my yoga mat and tripod for the camera.

This is it! I hope I didn't miss anything. If there is something you found useful please let me know and leave a comment below!

Thank you for visiting!

Monica


Saturday, February 22, 2014

Our New Playroom

 We moved to a 3 bedroom house and since we still cosleep we have a room just for them to play. Our homeschoo room is separate in a small house in our back yard. Here are some pictures.

The desk was given by our nice real state agent! Glenda and Steve.

Next to the light table I am setting up a writing and math workshop
for them which it is still in process.


They love playing with the light table!!! It was kindly given to us by a person in 
our local recycling yahoo group. He made it himself and the color even kind of matches the walls!! 


Thursday, February 20, 2014

Our first day of homeschool 2014

We had an excellent first day of school!!! It was fun and it went smoothly! Here are some pictures so you can take a look.


We did circle time. My Little Princess didn't want to be in the picture.

After circle time they chose an activity. Umi chose styrofoam sheets with tooth picks and beads


Marble spooning for Little Princes

After putting last activity back she worked with spooning beans.


Some math work.

Umi kept working on his last practical life activity.

When she was done she rolled the mat and put it back in the basket  right behind her.

Now is was time for one of my favorite activities...ART!


Umi and I were painting with water colors and Q-tips and Little Princess
was working on what she likes most...play dough!

Then she joined us with some painting fun!


When we were done they worked as a team to fold the table cloth!


Then we did our goodbye song and played with the scarves.


We had  LOTS of fun!!!